Site map :

Last upgrade to the site:
august 10th, 2002.

There has been

access to my Lego pages since creation.
This is an unofficial LEGO® web site.
LEGO® is a trademark of the LEGO® Group of companies
which does not sponsor, authorize or endorse this site.
You can visit the official LEGO website at: http://www.lego.com
Copyright 1996, 2000, Denis Cousineau
| |
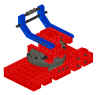
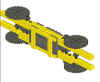
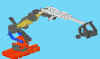
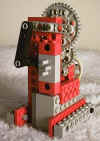
The ultimate Lego robot arm!

A quick survey of the robot arm located on the Mindstorms site show that
all the models have in common a very important default: their weight. They are
all heavy and cumbersome. One disadvantage of this is the speed: in
order to have enough strength, a lot of gear reduction must be used,
increasing even more the weight. As a consequence, these robots are slow
moving, and prone to breaks.
We propose here the lightest robot arm ever made, the simplest too, since
it requires only 240 pieces exactly. It is also an arm that has a very wide
range, reaching as far as 18 inches (50 cm) but also good for close range
since it can touch its base. It can also turn more than 360 degree, but at
some point, the hoses and wires inside the base will get too stuck... Finally,
speed is high, going from fully retracted to fully extended in less than 3
seconds.
This arm necessitates 4 controls (1 for rotating the base, 2 for the arm
and forearm, and one pneumatic for the hand - not visible in the picture). It
can be troublesome for the RCX, but using multiplexors (either electronic, see
TFM pages, or mechanical - see my pages below), the RCX has the ability to
control this arm.
I give below some snapshots to help you build this arm. If you
appreciate the design, please let me know. If you have improvement (to make it
lighter, faster, or whatever), let me know too.
Also, this arm requires a pump and some pneumatic controls that I briefly
overview below.
You can see:
For your convenience, I added the LDRAW files for each pieces. That way,
you can peruse in more details the assembly.
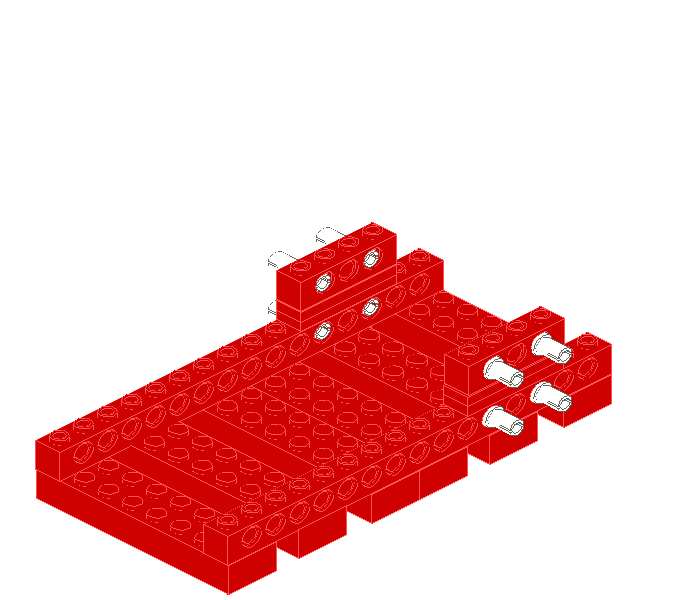
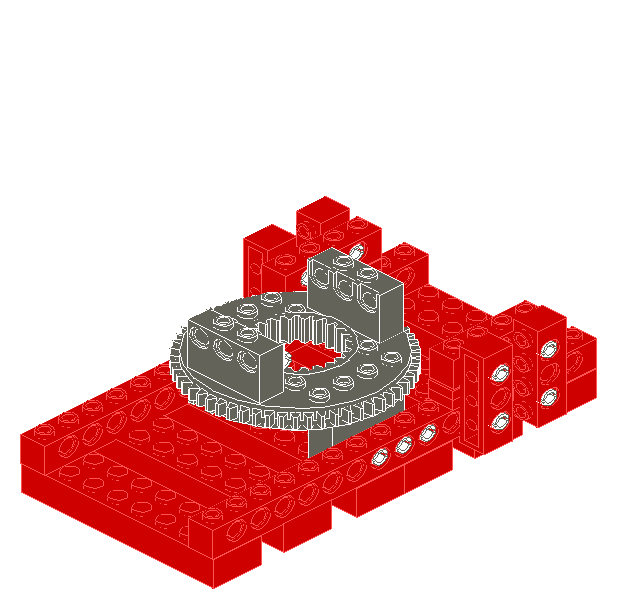
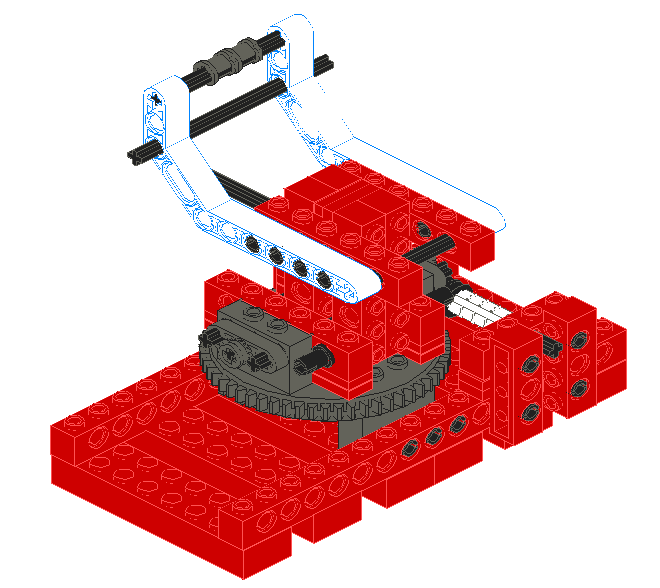
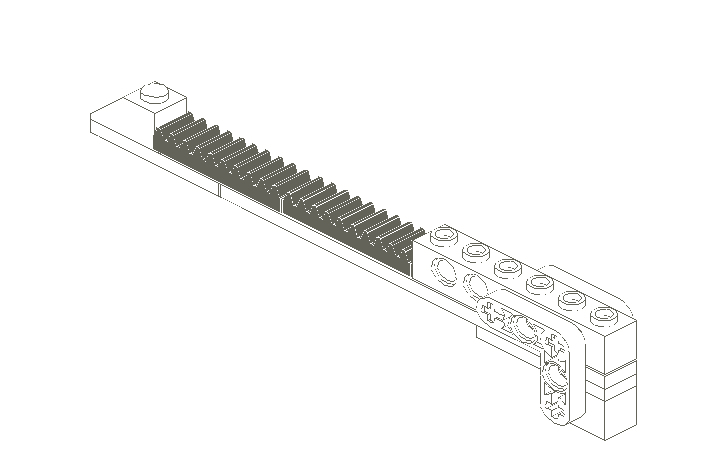
- The base (1_base.dat)
The base simply hold the turntable. It has to be rigid, and somehow
heavy is a good idea. On the back, there's an axle connected to an
endless worm gear. Connect this axle to the motor of your choice.


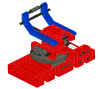
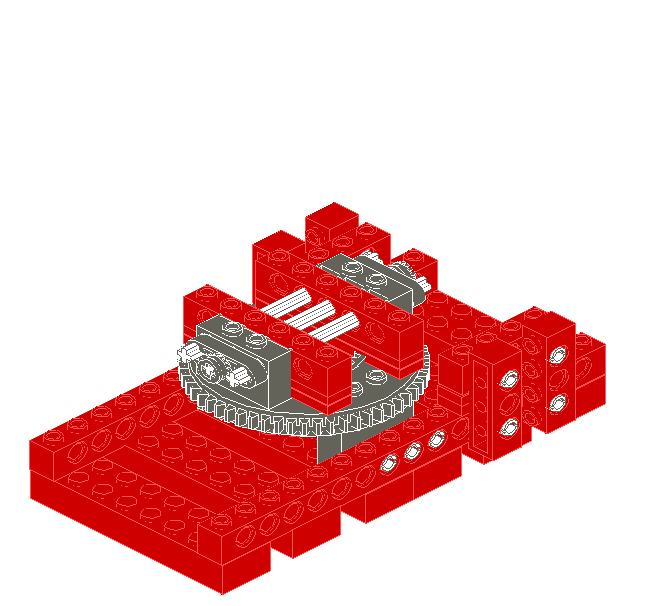
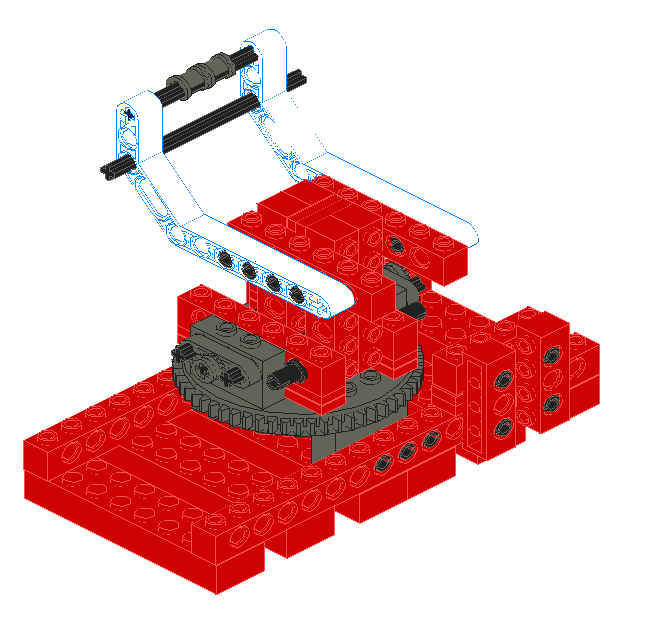
- The arm (2_arm.dat)
The arm is perfectly symetrical both left-right, and back-forth. Two
motors are embedded in this part, that will be responsible for the movement
of the arm and the forearm. You will need to connect the wires and pass them
through the base. If you need more space, the last axle on top of the
turntable can be removed easily, and the blue beams can be lifted forward.

- The forearm (3_forarm.dat)
The forearm is simple.
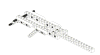
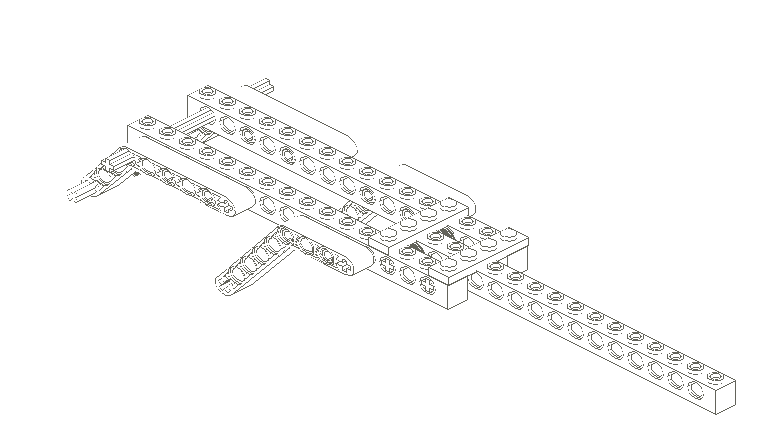
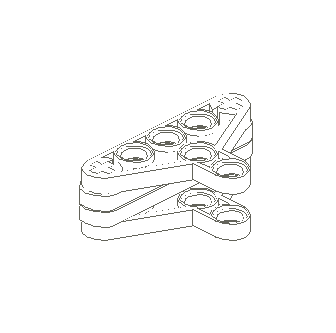
- The levers and the sliders (6a_dented.dat,
6b_dented.dat, 5_slider.dat)
The levers are dented, so that the motors on the arm will push on them,
or pull them. The sliders are simply a slippery place where the levers
can move freely without friction, and who can change their orientation as
the arm extend or contract. The levers, when contracting, acts like
muscles, they simply for the arm to get closer to the other section, bending
it along the axle.
 x2 x2
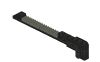
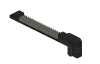
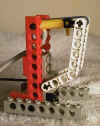
- The hand (4_hand.dat)
(funny, it should have been black!) The only part missing from the
hand is a large piston connecting from the top axles to the connectors
inside the two triangular parts. Instead of these triangles, you may use
right-angle pieces, but I had no more... The tires are meant for a better
grip, and to compensate the weight of the piston, so that the hand is always
correctly oriented toward the floor.
- The full assembly (0_FullArm.dat)
You need to connect the motors located on the arm, put hoses to the
piston on the hand, and install a motor at the base to make it turn, and
Voila!
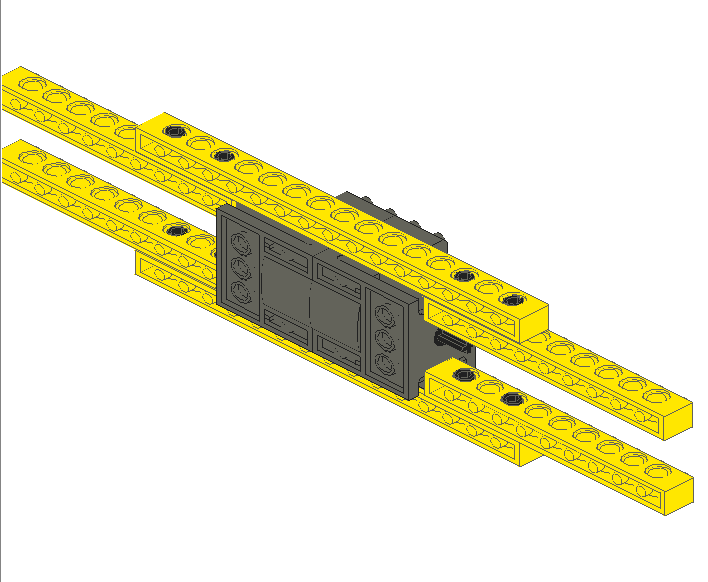
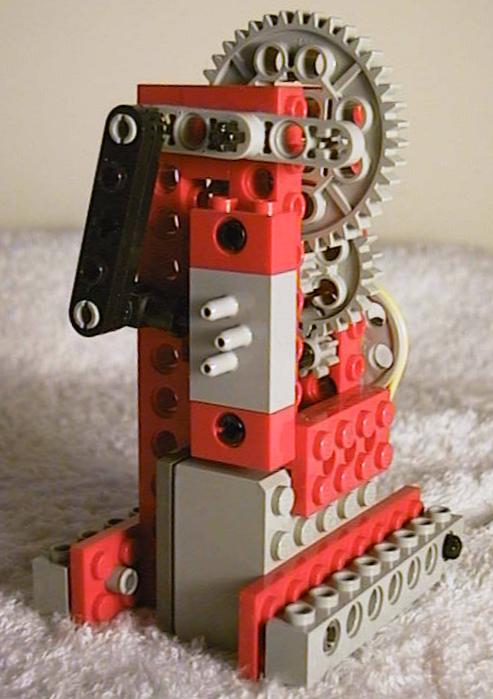
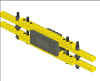
In order to control pneumatics, we need to be able to turn on or off a Lego
switch, and we also need to supply pressure into the hoses. To
accomplish all this, I build a control center, as see below.
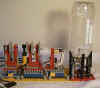
This control center has, from left to right:
 | A Lego switch controller, taken directly from Soh's pages (see link on
my home page), except that I placed it vertically for reasons of
space. |
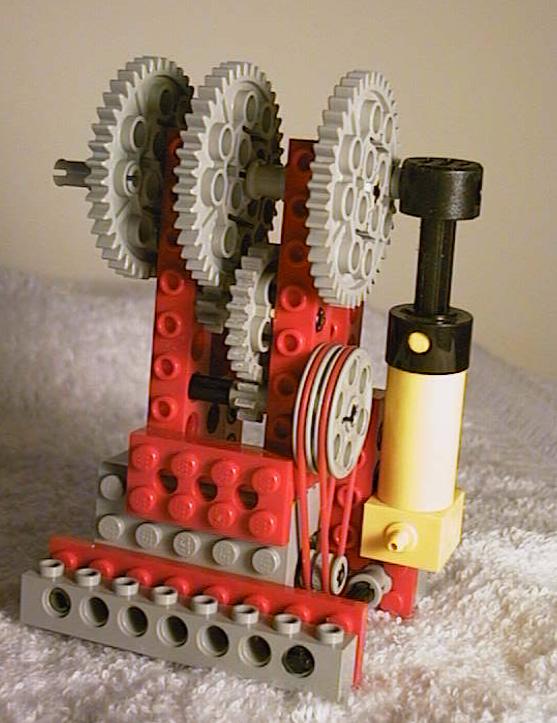
| A pump. I used the exact same design as for the Lego switch above,
that is, the same motor and gear reduction, but instead of being connected
to a switch with a lever, it is connected to a pump. There is space
for a second pump (if I had a second pump) on the other side so that they
could work together, 180 degree apart. |
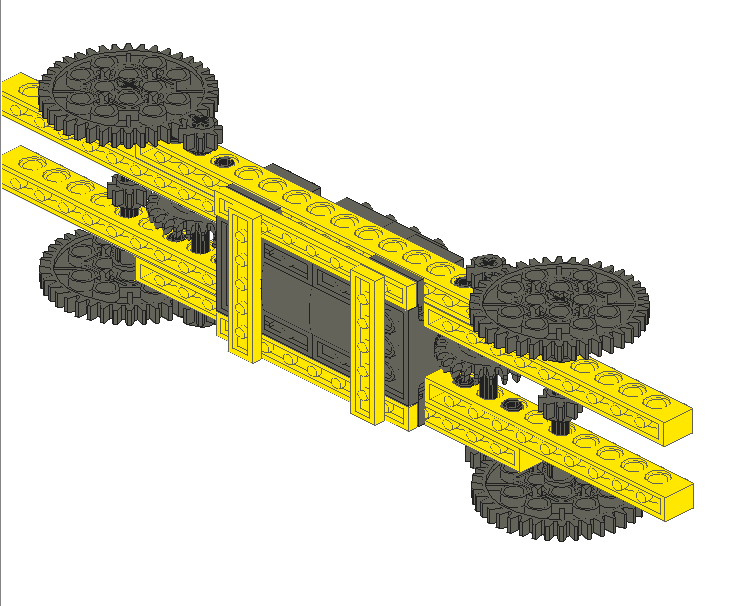
| Since I didn't want the pump to function all the time, I install a
pressure tank (see my own pages on that topic in Physics of Lego).
However, I needed a pressure detector that will start or stop the pump
when pressure is too low or too high. I borrowed the following
pressure switch from the Hempel design pages. |
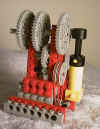
Connections: the pressure switch is connected to a power source that is
always on (not the RCX), such as a battery pack with the On button pushed in.
The other extremity of the pressure switch is connected to the pump. The
Lego switch can be connected to the RCX. However, because the three motors on
the arm and the pressure switch totalized 4 outputs (only three are available
on the RCX, I used a serial
multiplexor of my invention (described below) to control either the base
or the hand with one output.
|