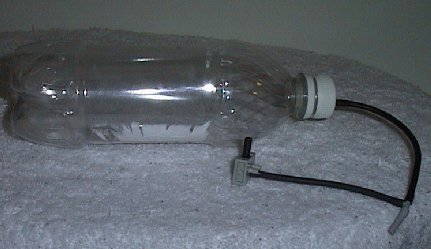
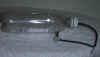
The Lego submarine kit offers a small pressure tank. However, if you didn’t
buy this kit, it is easy enough to build your own.
The only thing you need is a Soda bottle, preferably not too large since
it takes forever to fill, and glue (epoxy worked fine with me).
Drill a small hole in the cap (1/8 of an inch), insert a small Lego gray
rigid hose in it (you can cut it to ½ inch, if you wish), and glue it. That’s
it! The picture below shows mine.
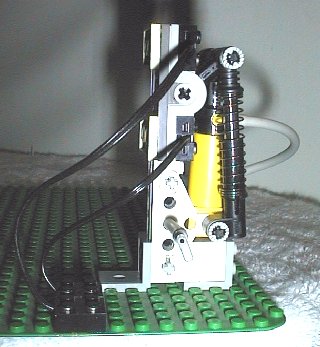
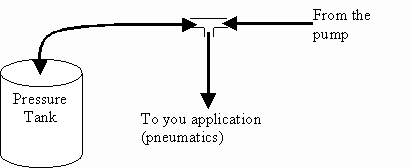
You connect it to the pump, using a T-connector to link with your
applications (the pneumatics).
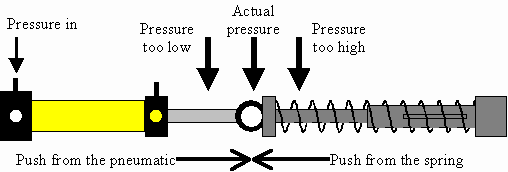
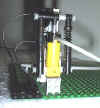
The idea behind a pressure regulator is to stop the pump if the pressure
is to high, and to start it again if the pressure gets too low.
One way to measure the pressure is to have a pneumatic opposing a spring.
The tip of the pneumatic indicates the level of pressure, as seen in the
following figure.
The difficulty is twofold: i) find the adequate combination of shock or
shocks to compensate adequately the pressure; ii) connect the tip of the
pneumatic to an interrupter that will turn on or off the pump.
Some tests indicate that two shocks are working properly. Also, the Lego
interrupter is working just fine.
The following figure shows the actual implementation I’ve made:
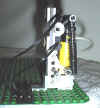
The connections are as follow:
- One electric contact goes to the battery pack
- The other electric contact goes to the motor that activate the pump
- The hose goes to the pressure tank.